Showing posts with label anasmanis. Show all posts

Saturday, August 1, 2015

Color Club Poptastic Pastel Neon colection

Hello my friends!

Today I have swatches from Color Club's pastel neons (yea I'm late for these lol). I got these thanks to a deal that was on the Today Show a couple weeks ago. How could I say no to this collection at $18 plus shipping?!

I'll show you swatches first and give you my overall opinion at the end.

My swatches are all three coats plus top coat and taken indoor under my lightbox and outdoor.


Color Club Poptastic Pastel Neons

Feathered Hair Out There:

Feathered Hair Out There indoor


Feathered Hair Out There outdoor

Hot-Hot-Hot Pants:

Hot-Hot-Hot Pants indoor

Hot-Hot-Hot Pants outdoor

Disco's Not Dead:

Disco's Not Dead indoor

Disco's Not Dead outdoor

Under The Blacklight:

Under The Blacklight indoor

Under The Blacklight outdoor

'Till The Record Stops:

'Till The Record Stops indoor

'Till The Record Stops outdoor

Meet Me At The Rink:

Meet Me At The Rink indoor

Meet Me At The Rink outdoor

Diggin' The Dancing Queen: 


Diggin' The Dancing Queen indoor

Diggin' The Dancing Queen outdoor


Overall these polishes are beautiful but the formula is not that great. The first coat is sheer and very streaky. Second coat is still not opaque enough and it's still patchy. By the third coat it's opaque and finally self levels. By doing thin coats you won't end up with a big blotchy mess. It also won't feel so thick vs if you do thick coats. Top coat smoothes everything out and makes them look super shiny. 

So be patient with these. Let your coats dry before adding the next coat. For me the end result was worth it because I love the colors! This collection might not be for you if you don't like three coaters. I don't mind since I own a couple polishes that have the same type of formula. I have some nail art plans with these and I can't wait to show you guys!


So what do you guys think of this collection? Love it? Not for you? Do you already have it? Leave your comments below.


Charms are from dailycharme.com


Thank you for reading! See you next time!


Don't forget to follow me on
Bloglovin
Instagram

Like my Facebook page!
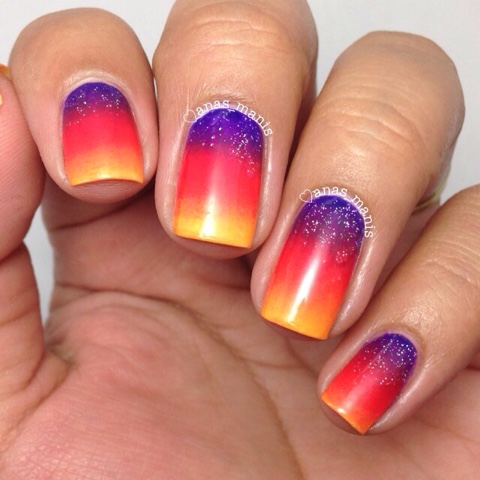

Wednesday, July 29, 2015

EA Polish swatches and review

**press sample. Items provided free of charge in exchange for swatches and review. All opinions are my own**


Hello there!

Today I'll tell you about EA Polish. Formally known as Embella Adorn. They are a beauty and accessories lifestyle brand. Each of their polishes is accompanied with a stylish ring. Their polishes are 4 free meaning they don't contain Dibutyl Phthatlat, Toluene, Formaldehyde or Camphor. 


I received four polishes along with four rings. From left to right Tulle Me Not, One Piece, Fine China and Carry On.

Tulle Me Not:
Lime green jelly polish. This is two thin coats and one semi thick coat plus Seche Vite top coat. 


Check out the pretty tree design gold tone ring.

One Piece:
Dark fushia toned creme. Two coats plus top coat. This could actually be a one coater but I did two thin coats instead.


Check out the funky twisted ring.

Fine China:
Dark blue-teal jelly polish with gold and silver holo glitter through out. Two coats plus top coat. This one is beautiful but it's a strainer so a good base coat and maybe a peel off base coat should be worn under this one. 

I accidentally deleted the bottle shot! :(


I love the ring! It's my favorite of the four!

Macro:

Carry On:
Dark purple metallic polish with some blue undertones. Two coats plus top coat.

Not a big fan of this ring.

Since I couldn't get a color accurate photo under my lightbox I took a quick shot outside. Please excuse the shine on my fingers!


Overall I like the formulas on all four polishes. I wish Fine China didn't stain so much but I think most blues/teals stain. I think it's great that they come with a ring. I've never seen that before. 

What do you think of these polishes? Do you like the rings? Is this something you would try?

Check out their shop www.eapolish.com
and their Instagram @eapolish 


Thank you guys for stopping by. See you soon with swatches of Color Club pastel neon collection :)


*press sample. Items provided free of charge in exchange for swatches and review. All opinions are my own**


Tuesday, July 28, 2015

Safari gradient nails

Hey beauties!

Today's nail art is safari nails I did for twinsietuesdaynailart, a weekly promt on IG hosted by @99probsbutmynailsaint1 There's a new prompt every week and I've tried doing most of them. 

Let's begin by showing you the inspiration photo I found. 


Isn't it lovely? I wanted to attempt doing something like this on my nails. It was a lot harder than I thought!

Here's what I used for this design:


Pictured: 
Sinful Colors Snow Me White
OPI Do You Have This Color In Stock-Holm?
Nicole by OPI My Sol Shines Brighter
Wet n Wild Sunny Side Up
China Glaze Fairy Dust
Seche Vite Top Coat
NYC matte me crazy
Kolinsky clean up brush 
Small brush 

Not pictured:
Latex free make up wedge
Bliss kiss simply peel latex barrier

Here is the gradient before adding the animal silhouettes.


I applied one coat of Sinful Colors Snow Me White as my base. Then I applied the liquid latex around my cuticules for easy clean up. I grabbed my make up wedge and applied my three colors beggining with OPI at the top, then NOPI and then Wet n Wild. I rolled the sponge on my nail and added more polish to the sponge. Repeated this on all my nails. I did about three or four passes on all my nails (all 10 nails!). After my gradient was done with a clean side of the sponge I dabbed on some Fairy Dust at the top. I topped it all off Seche Vite top coat.

For the silhouettes I used black acrylic paint. I used a brush that came in a set I bought from Walmart, but I trimmed some of the bristles off to make it thinner. 
I drew some animal shapes and filled them in. I think I probably tried three times with each nail! It's a miracle I didn't just give up and threw everything away! Lol 

After all my "animal" shapes were done I top coated it all! (What animal is on my middle finger? Lol) 

Here's the final result.


I hated the glare so I made them matte. I liked it much better!


What do you guys think? Do they look like animals? 


Check out the hashtag #twinsietuesdaynailart on IG to see all of the art work that's been done by a ton of talented ladies! And follow Melanie if you aren't following her yet! 


Hope you guys liked this design. Thank you for reading and don't forget to follow me! See you next time! :)


Saturday, July 25, 2015

Envy Lacquer Bright Rock Candy Collection swatches

**press sample**

Hello lovelies!!

Today I have some beautiful swatches from Envy Lacquer Bright Rock Candy Collection. Pre-sale starts today! Hurry grab your wallets!! Official release of this collection is August 1st!

Collection consists of three jelly based polishes filled with lots of holo glitter and some glass like glitter! Zapped Apple, Blueberry Blizzard, and Razzmatazz. I love the names!!


Top: Zapped Apple
Middle: Blueberry Blizzard
Bottom: Razzmatazz

Ok let's begin with the swatches!

Zapped Apple: 


This photo was taken indoors in my lightbox. Three thin coats plus top coat. 

Outdoor sun shots


Look at all that sparkly goodness!!

Macro:


Blueberry Blizzard:


Photo taken indoors in lightbox. Three thin coats plus top coat. 

Outdoors


So gorgeous!!

Macro:


Razzmatazz:


This was taken indoors in lightbox. Two coats plus top coat.

Outdoors


Macro:


*Edit 
I decided to add a third coat to Razzmatazz to see if there was a difference. It does make it look more squishy and sparkly!


Three coats plus top coat.

Macro:
Razzmatazz three coats plus top coat.


The formula on these are great. Razzmatazz was the one with the best formula. They dry quick so I don't mind doing three coats with these. The result is amazing! I kept fighting with sun for some of these! Lol

I can't pick a favorite! They're all beautiful! Which one do you like best?

Presale for this collection starts today! Full size collection will retail for $25 plus shipping. Individual full size (15 ml) will be $9.99. 

Collection will launch on August 1st. Spend $50+ and get free shipping.

Melody's shop
www.envylacquer.com

Follow Envy Lacquer on Instagram


Thank you for reading :)


**press sample. Items provided free of charge in exchange for swatches and review. All opinions are my own**


Friday, July 24, 2015

Floral design on nude base

Hi beauties! 

Today I have a floral design on a nude base inspired by a phone case. I'm always browsing Pinterest for nail inspo when I can't sleep!

Here is the mani along with the inspiration photo.


Here's what used for my design.

Sheer nude base 
Acrylic paint
Small detailing brush
Clean up brush (kolinsky 666 from Amazon)
Seche Vite top coat
NYC matte me crazy matte top coat

Begin with two-three coats of your sheer nude polish. Wait a couple minutes for it to dry. Once it's dry start painting a couple dots/blobs along the tip of the nail in your desired colors. These will turn into flowers.

After your dots are done start adding some leaves and stems where there's plain spots. I used two shades of green for the leaves and stems.

Go back and start adding centers and highlights to your flowers. 

Clean up your cuticules with your clean up brush dipped in acetone and top coat.

Final result:

I wanted them matte so I applied one coat of NYC matte me crazy. I prefer these matte. I love final result!!


What do you guys think of this design? Do you like it better glossy or matte?

Thank you for reading. See you next time :)


Follow me on Instagram https://instagram.com/anas_manis/

Facebook
https://m.facebook.com/anasmanis2

Bloglovin
https://www.bloglovin.com/anasmanis