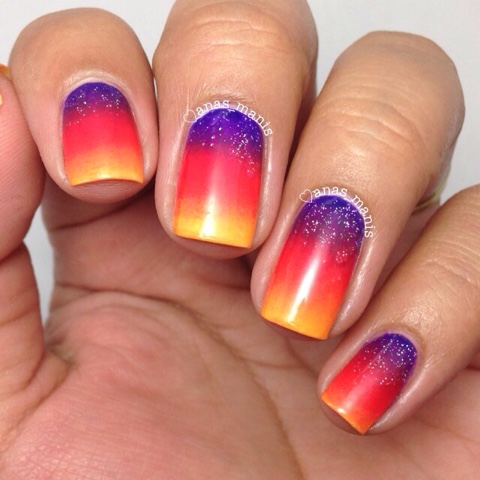
Showing posts with label gradient. Show all posts

Monday, August 22, 2016

Bestie Twin Nails & Bornpretty Review

Hello!

Today I'm reviewing some nail protectors/stickers from bornprettystore.com item #27347. These are perfect for when you are out of liquid latex and want to save time on clean up on gradients, watermarbles, or stamping. Let's take a look at them.

Item #27347 from bornprettystore.com

This is how the nail protectors come. There are 10 in a package. They are very easy to peel off. They are available in 5 different colors but I really don't think the color matters. 


I ended up using all 10 for a gradient I had planned on doing. These protectors were perfect. Just the right amount of stickiness to them. I actually placed them on before applying my white base. I didn't want to smudge it. I used OPI I Cannoli Wear OPI, two thin coats no top coat.


For this gradient I used Fresh Paint Honeydew, Sinful Colors Tempest, and Zoya Kitridge.


As you can see they did a good job at protecting my fingers from the mess. I had very little clean up to do.


Here is the final result. I topped my gradient off with Zoya Leia, Sinful Colors Pink Ansen, Seche Vite, and Zoya Matte Velvet top coat. These were actually a part of some BTN I did with @thatrighthandtho from Instagram. I really love how they came out and I'm happy I did both hands, all 10 fingers!!


And here is our collage along with the inspo picture I found on Pinterest. Make sure to check out @thatrighthandtho's page and give her a follow. She's got some gorgeous manis!

Hope you guys enjoyed this post. Let me know what you think of these nail protector stickers and our BTN too of course. You can get your own at bornprettystore.com You can use my code SMPX31 for 10% off regular priced items. They offer worldwide free shipping!


Thank you for stopping by!


Thursday, June 16, 2016

#TheLacquerRing: Seafoam Green

Last month I was invited to participate in a group called The Lacquer Ring on Facebook. Some awesome ladies are in there so I was very excited to join! There's nail art prompts about every two weeks (twice a month) and I haven't been able to participate until now.

This week's prompt is seafoam green. There's so many shades that could be seafoam green so I went with something as close as possible. Let's take a look shall we!

Polish pictured: Sally Hansen Mint Sorbet

Items Used
OPI I Cannoli Wear OPI, Sally Hansen Mint Sorbet
Sinful Colors Mint Apple, Seche Vite top coat, Zoya Matte Velvet top coat
Latex free make up wedge
Not pictured: glammymani vynils, clean up brush

I started off with an off-white base. I used OPI I Cannoli Wear OPI. Then I applied some single stripe vynils from Glammymani.com close to the tip of the nail. Using a latex free makeup wedge I did a gradient using Sally Hansen Mint Sorbet and Sinful Colors Mint Apple. I did about 3 passes on each nail. I quickly removed the vynils and applied a coat of Seche Vite top coat. 

Pictured Zoya Matte Velvet top coat

Then I applied one coat of Zoya Matte Velvet top coat. I actually prefer the matte version of this. What do you guys think?

Take a look at the other ladies work following the InLinkz link below.


Wednesday, February 10, 2016

Pink-Red Gradient

Hello!

We're on day 10 of our 14 days of Valentine's series hosted by Polish Galore

For today's post I did a textured gradient. Let's take a look!

Zoya Chyna

I used Zoya Chyna pixie dust and OPI Pussy Galore liquid sand in this gradient. I applied Chyna to half of my nail and Pussy Galore on the other half then applied both to a latex free make up wedge and sponged on two coats. I didn't apply any top coat since I loved the sparkle and texture of it.

I had to clean up around my nail with a brush and acetone since I didn't apply tape and I've been out of liquid latex for a while.

OPI Pussy Galore

Here's another look at this pretty gradient. I really liked this but it was a pain to take off! I would totally do it again though!

What do you think of this look? Do you like textured polishes? 

We're so close to our final post for this series!

Thank you for looking. Happy polishing! :)


*Nothing To Disclose*


An InLinkz Link-up

Thursday, September 10, 2015

Rainbow gradient nails

Today I have some rainbow gradient nails. I used the Formula X Infinite Ombre kit. The kit comes with a silver base and 4 jelly type polishes: Platinum Prime, Infinite Indigo, Boundless Berry, Limitless Lemon, and Timeless Teal. You can find the kit here.


I applied one coat of the platinum prime and then sponged on silver holo glitter, Zoya Cosmo. I applied one coat of Seche Vite top coat to smooth down the glitter. Then I applied the four color jellies on a latex free make up wedge at a slant and dabbed it on the nail. Repeated this twice. I added one final coat of Seche Vite. 

On the ring finger I waited for the top coat to be fully dry before applying the unicorn vynil from eatsleeppolish.com and dabbed on some white polish. Top coated and done.


What do you guys think of this look? I loved it. I did something similar a couple weeks ago but I did some black stamping over the gradient.

Hope you guys enjoyed this mani. 
See you next time :)


**infinite ombre kit provided free of charge as part of the preenmevip program from preen.me**

Follow me on Bloglovin


Tuesday, July 28, 2015

Safari gradient nails

Hey beauties!

Today's nail art is safari nails I did for twinsietuesdaynailart, a weekly promt on IG hosted by @99probsbutmynailsaint1 There's a new prompt every week and I've tried doing most of them. 

Let's begin by showing you the inspiration photo I found. 


Isn't it lovely? I wanted to attempt doing something like this on my nails. It was a lot harder than I thought!

Here's what I used for this design:


Pictured: 
Sinful Colors Snow Me White
OPI Do You Have This Color In Stock-Holm?
Nicole by OPI My Sol Shines Brighter
Wet n Wild Sunny Side Up
China Glaze Fairy Dust
Seche Vite Top Coat
NYC matte me crazy
Kolinsky clean up brush 
Small brush 

Not pictured:
Latex free make up wedge
Bliss kiss simply peel latex barrier

Here is the gradient before adding the animal silhouettes.


I applied one coat of Sinful Colors Snow Me White as my base. Then I applied the liquid latex around my cuticules for easy clean up. I grabbed my make up wedge and applied my three colors beggining with OPI at the top, then NOPI and then Wet n Wild. I rolled the sponge on my nail and added more polish to the sponge. Repeated this on all my nails. I did about three or four passes on all my nails (all 10 nails!). After my gradient was done with a clean side of the sponge I dabbed on some Fairy Dust at the top. I topped it all off Seche Vite top coat.

For the silhouettes I used black acrylic paint. I used a brush that came in a set I bought from Walmart, but I trimmed some of the bristles off to make it thinner. 
I drew some animal shapes and filled them in. I think I probably tried three times with each nail! It's a miracle I didn't just give up and threw everything away! Lol 

After all my "animal" shapes were done I top coated it all! (What animal is on my middle finger? Lol) 

Here's the final result.


I hated the glare so I made them matte. I liked it much better!


What do you guys think? Do they look like animals? 


Check out the hashtag #twinsietuesdaynailart on IG to see all of the art work that's been done by a ton of talented ladies! And follow Melanie if you aren't following her yet! 


Hope you guys liked this design. Thank you for reading and don't forget to follow me! See you next time! :)